I’ve been making this blueberry jam every summer for years, and it’s become one of my absolute favorites to have on hand. The secret ingredient that sets it apart is a splash of balsamic vinegar, which adds an unexpected depth of flavor that pairs beautifully with the sweet blueberries. Trust me, once you try homemade jam, you’ll never want to go back to store-bought!

| Preparation Time | 30-40 minutes |
| Cooking Time | 20-30 minutes |
| Total Time | 50-70 minutes |
| Level of Difficulty | Medium |
| Servings | 5 cups of jam |
Estimated Nutrition
Estimated nutrition for the whole recipe (without optional ingredients):
- Calories: 1850-1950
- Protein: 6-8 g
- Fat: 2-3 g
- Carbohydrates: 470-490 g
Ingredients
- 3.75 lb fresh blueberries
- 2.5 cups granulated cane sugar
- 2 tsp lemon zest
- 3 tbsp lemon juice
- 2 tbsp balsamic vinegar
- 1/4 tsp salt
- 1/2 tsp unsalted butter
Step 1: Prepare Blueberries and Combine Base Ingredients
- 3.75 lb fresh blueberries
- 2.5 cups granulated cane sugar
- 2 tsp lemon zest
- 3 tbsp lemon juice
- 2 tbsp balsamic vinegar
- 1/4 tsp salt
Rinse your fresh blueberries and place them in a large heavy-bottomed pot.
Add the granulated cane sugar, lemon zest, lemon juice, balsamic vinegar, and salt to the pot.
Stir everything together until the sugar begins to dissolve and the mixture is evenly combined.
This initial mixing allows the sugar to start drawing out the blueberries' natural juices, which will help you achieve the perfect gel texture later.
Step 2: Cook Blueberries and Separate Juice from Solids
- blueberry mixture from Step 1
Bring the blueberry mixture to a boil over medium-high heat and maintain a rolling boil for 8-12 minutes, stirring occasionally to prevent sticking.
The berries will begin to break down and the mixture will darken slightly.
Pour the entire contents through a fine-mesh strainer set over a large bowl, pressing gently on the berries to extract as much juice as possible without forcing pulp through.
Save the strained juice in the pot and reserve the cooked berries—you'll recombine them shortly for the best texture.
Step 3: Reach Setting Point and Test for Gel
- strained blueberry juice from Step 2
Return the strained blueberry juice to the pot and boil it over medium-high heat without the berries.
Use a reliable candy or jam thermometer to monitor the temperature—you're aiming for exactly 221°F, which is the gel point for jam.
I like to place a small plate in the freezer before starting this step so I can do the cold-plate wrinkle test: drop a small spoonful of the hot juice onto the cold plate and let it cool for 30 seconds, then push it with your finger—if it wrinkles and doesn't run back together, you've reached the perfect setting point.
This typically takes 15-20 minutes of boiling.
Step 4: Recombine Berries and Add Finishing Touch
- cooked blueberries from Step 2
- 1/2 tsp unsalted butter
Once the juice reaches 221°F, add the cooked blueberries from Step 2 back into the pot along with the unsalted butter.
Stir gently and return to a boil for 2 minutes—the butter will help reduce foam and add a subtle richness to the jam.
Remove from heat and let the jam rest for 5 minutes before jarring, which allows the foam to settle and makes for cleaner jars.
Step 5: Fill Jars and Prepare for Water Bath
- jam from Step 4
While the jam rests, prepare your canning jars by running them through a hot dishwasher cycle or placing them upright in a pot of simmering water for 10 minutes—this sterilizes them and keeps them warm, which helps the jam set properly.
Have your lids and bands ready in a bowl of warm water.
Ladle the hot jam into the warm jars, leaving exactly ¼-inch headspace at the top—this space is crucial for the seal to form properly.
Wipe each jar rim clean with a damp cloth to remove any jam drips, then place the lid and band on top, tightening the band by hand until snug but not overly tight.
Step 6: Process Jars in Water Bath and Cool
- processed jars from Step 5
Place the filled jars on a rack in a water bath canner or large pot filled with enough water to cover the jars by 1-2 inches.
Bring the water to a rolling boil and process for 10 minutes at a rolling boil—this kills any remaining microorganisms and creates an airtight seal.
I find it helpful to start my timer only after the water reaches a full boil to ensure proper processing time.
Using jar lifters, carefully remove the jars and place them upright on a clean towel or wooden rack at room temperature.
Do not move or disturb the jars during cooling—leave them undisturbed for 12-24 hours as they cool and the seals set.
Step 7: Test Seals and Store
After 12-24 hours of cooling, check the seals by pressing the center of each lid—it should be concave (curved downward) and not flex.
Any jars that didn't seal properly can be refrigerated and enjoyed within 3 weeks, or you can reprocess them with fresh lids.
Properly sealed jars will store in a cool, dark place for up to one year.
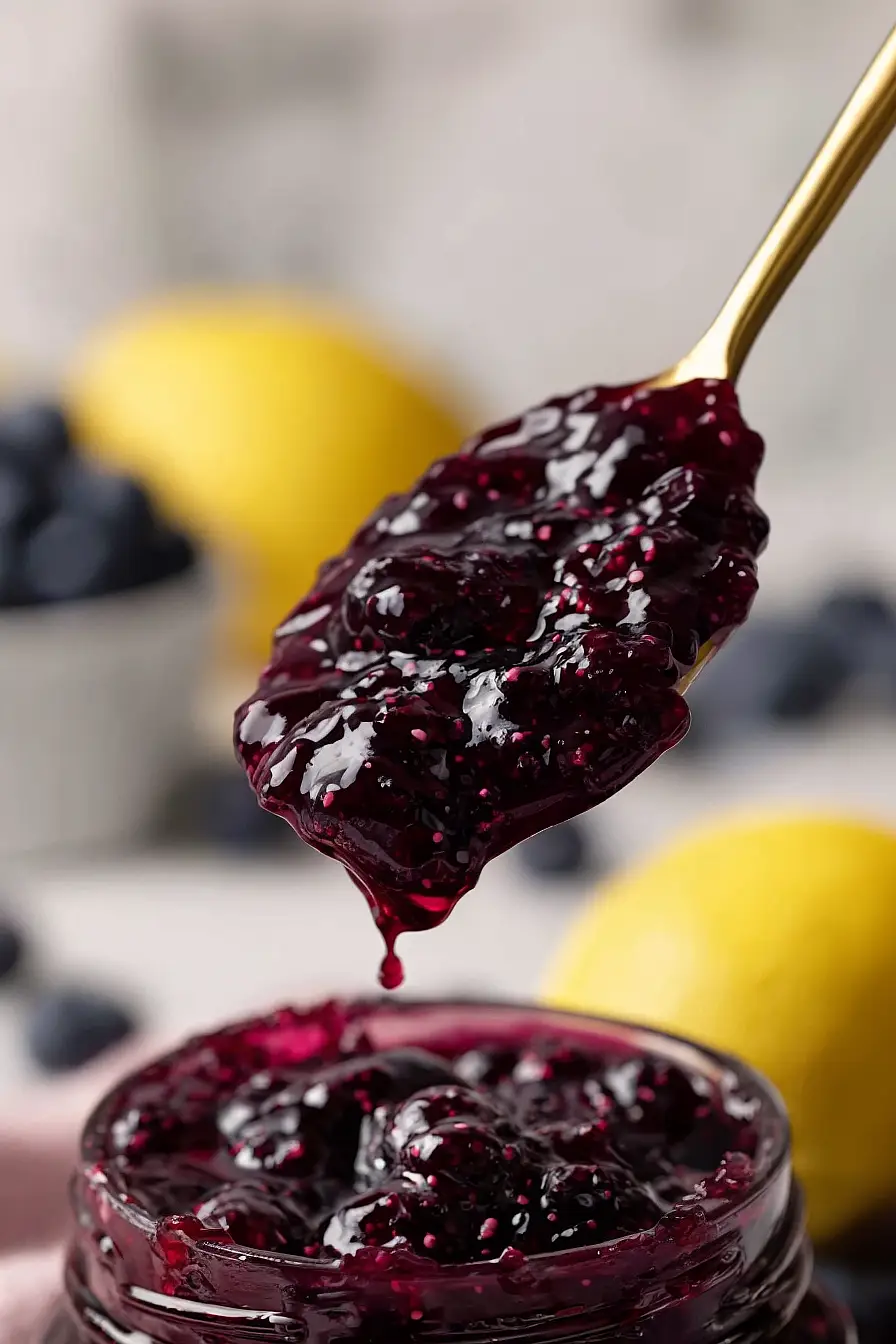
Delicious Canning Blueberry Jam
Ingredients
Method
- Rinse your fresh blueberries and place them in a large heavy-bottomed pot. Add the granulated cane sugar, lemon zest, lemon juice, balsamic vinegar, and salt to the pot. Stir everything together until the sugar begins to dissolve and the mixture is evenly combined. This initial mixing allows the sugar to start drawing out the blueberries' natural juices, which will help you achieve the perfect gel texture later.
- Bring the blueberry mixture to a boil over medium-high heat and maintain a rolling boil for 8-12 minutes, stirring occasionally to prevent sticking. The berries will begin to break down and the mixture will darken slightly. Pour the entire contents through a fine-mesh strainer set over a large bowl, pressing gently on the berries to extract as much juice as possible without forcing pulp through. Save the strained juice in the pot and reserve the cooked berries—you'll recombine them shortly for the best texture.
- Return the strained blueberry juice to the pot and boil it over medium-high heat without the berries. Use a reliable candy or jam thermometer to monitor the temperature—you're aiming for exactly 221°F, which is the gel point for jam. I like to place a small plate in the freezer before starting this step so I can do the cold-plate wrinkle test: drop a small spoonful of the hot juice onto the cold plate and let it cool for 30 seconds, then push it with your finger—if it wrinkles and doesn't run back together, you've reached the perfect setting point. This typically takes 15-20 minutes of boiling.
- Once the juice reaches 221°F, add the cooked blueberries from Step 2 back into the pot along with the unsalted butter. Stir gently and return to a boil for 2 minutes—the butter will help reduce foam and add a subtle richness to the jam. Remove from heat and let the jam rest for 5 minutes before jarring, which allows the foam to settle and makes for cleaner jars.
- While the jam rests, prepare your canning jars by running them through a hot dishwasher cycle or placing them upright in a pot of simmering water for 10 minutes—this sterilizes them and keeps them warm, which helps the jam set properly. Have your lids and bands ready in a bowl of warm water. Ladle the hot jam into the warm jars, leaving exactly ¼-inch headspace at the top—this space is crucial for the seal to form properly. Wipe each jar rim clean with a damp cloth to remove any jam drips, then place the lid and band on top, tightening the band by hand until snug but not overly tight.
- Place the filled jars on a rack in a water bath canner or large pot filled with enough water to cover the jars by 1-2 inches. Bring the water to a rolling boil and process for 10 minutes at a rolling boil—this kills any remaining microorganisms and creates an airtight seal. I find it helpful to start my timer only after the water reaches a full boil to ensure proper processing time. Using jar lifters, carefully remove the jars and place them upright on a clean towel or wooden rack at room temperature. Do not move or disturb the jars during cooling—leave them undisturbed for 12-24 hours as they cool and the seals set.
- After 12-24 hours of cooling, check the seals by pressing the center of each lid—it should be concave (curved downward) and not flex. Any jars that didn't seal properly can be refrigerated and enjoyed within 3 weeks, or you can reprocess them with fresh lids. Properly sealed jars will store in a cool, dark place for up to one year.